Cell density meter is an instrument that is used for measuring of the density of (microbial) cells in suspension. The cell density meter is a portable spectrophotometer that can be easily carried from one point to another in the laboratory especially during an experiment. It can be used in the microbiology laboratory to elucidate the optical density (OD) of microbial cells such as bacteria and fungi. Cell density meter can also be used to determine the OD of cells from a cell culture experiment.
It is important to note that cell cultures are turbid samples, so the absorbance (OD) measured is due to light scattering, and not due to molecular absorption. Clumping together of cells will also affect readings, so the medium they are suspended in will also make a difference. This means that the actual reading obtained is very dependent on the collecting area of the detector after the sample and the optical geometry of the system.
These vary depending on the make and model of instrument, so differences in readings between types of instruments are to be expected. The results from the experiment using cell density meter is usually reported or given in absorbance unites (OD). The cell density meter is so easy to use.
It is a hand held instrument and has an integral battery allowing it to be taken to where the cell cultures are growing for example in incubation cabinets, laminar flow cabinets or hood, under anaerobic conditions or even in a fume hood or safety cabinets. It is also important to note that the density (ρ) of a cell is defined by its relative water (ρ = 1 g/ml) content and the composition of its dry mass.
Features of the cell density meter
- Single beam LED cell density meter (Figure 1) measures OD at 600nm
- Small, portable with rechargeable battery
- Long lifetime LED source with little maintenance needed
- Easy to use, clean and sterilise
- Stores up to 99 results to download later

Mode of operation or usage
The cell density meter accepts a variety of cuvettes (Figure 2)and tubes- including 10, 12, and 16mm diameter test tubes meaning that it can be used with Erlenmeyer side arm flasks during any experiment.
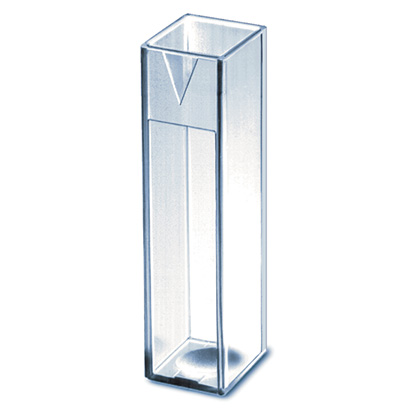
When in use, the triangular portion shown on the cuvette should face you upon usage. It should always be seen and not hidden (because this is the only way you know that you have inserted it well into the cell density meter).
Most importantly, you should always hold the cuvette at the top and not at the bottom or the sides because your finger prints on the cuvettes may affect the rays of light passing through the cuvette and this may negatively affect your readings. Always use a fresh cuvette for each experiment or test.
With no warm up time, just switch it on and it’s ready to use giving you results that are comparable to larger, more expensive spectrophotometers. The cell density of the cultures can be measured, and the results stored in the memory.
The results are given in Absorbance Units (OD). Once all measurements are taken, the up to 99 sample results can be viewed on the easy to read screen or the instrument can be connected to a PC or printer and the results downloaded.
Sources:
www.biochrom.co.uk/
www.fishersci.se/
Discover more from Microbiology Class
Subscribe to get the latest posts sent to your email.